Aug 13, 2015

Helllooo There!

hamburger

So it's been a while. Almost six months actually, but there's been a lot going on! Now that things have settled a bit, I'm going to get back into the blog and keeping up the site. Here's a quick update on everything that's been happening.

First, I did my first trade show, the National Stationery Show down in NYC at the Javits Center. It was a ton of work and while I didn't place as many orders as expected, I met some really great people, made a bunch of contacts, and received really helpful feedback about the kits. I hope to do more trade shows in the near future and I'll be going into more detail about NSS in another post.

Second, in April, my first crochet book, Happy-Gurumi, came out! I can't believe it's been over two years since I first sent out my book proposal, but it's really exciting to finally see everything come together. You can now purchase Happy-Gurumi on Amazon and Barnes and Noble!

Third, I started a new job, and while I would love for The Pudgy Rabbit to be my full time gig, I'm not quite at that point yet. However, work has been really great, and even though it's been an adjustment to fit everything in, I'm happy to say that I have five new designs available!

All the new designs are based around food, including this little hamburger and hot dog. They'll be up in the shop soon and I'm continuing to work on new products for the shop and recipes for the blog, so stay tuned!

hot dog

Feb 21, 2015

Chinese Bakery Style Orange and Strawberry Cream Cake

So I know the title is kind of long, but that's what this cake is! If you've never had a Chinese bakery style cake, it's layers of fluffy sponge cake filled with a variety of fruits and covered in a whipped cream frosting. These cakes are extremely light and airy, making them a great ending after eating a large meal. Growing up, I wasn't always the biggest fan of Chinese bakery desserts. I thought that they tasted kind of bland compared to sweeter American style cakes. Now that I'm older, my tastes have expanded and while I still love a good yellow cake covered in rich chocolate buttercream, I appreciate the subtle sweetness found in Chinese style desserts.

Orange Strawberry Cream Cake

Since I was making this cake for Chinese New Year, I decided to add a twist and do an orange sponge cake filled with lots ripe strawberries and whipped cream. Oranges are a symbol of good luck and prosperity for the new year due to their round shape and in Chinese the word for orange sounds similar to the word for wealth. I chose to use only strawberries in the filling for their red color since red is a sign of good fortune and happiness. So basically this whole cake is filled with good luck, success, and joy!

Feb 18, 2015

Red Bean Cheesecake

Happy Chinese New Year's eve! I hope everyone is ready to celebrate with family and friends and eat some crazy delicious food! Since making my own 
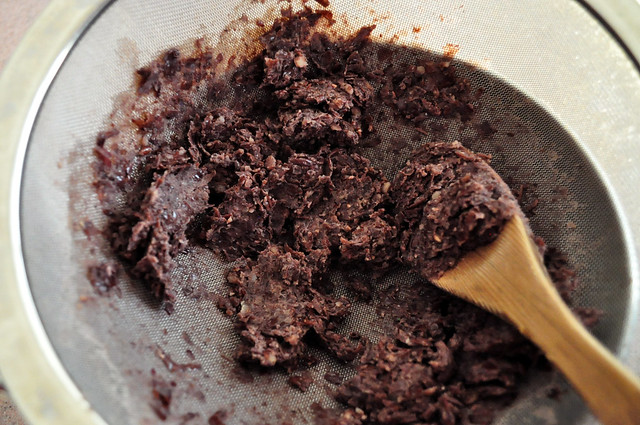
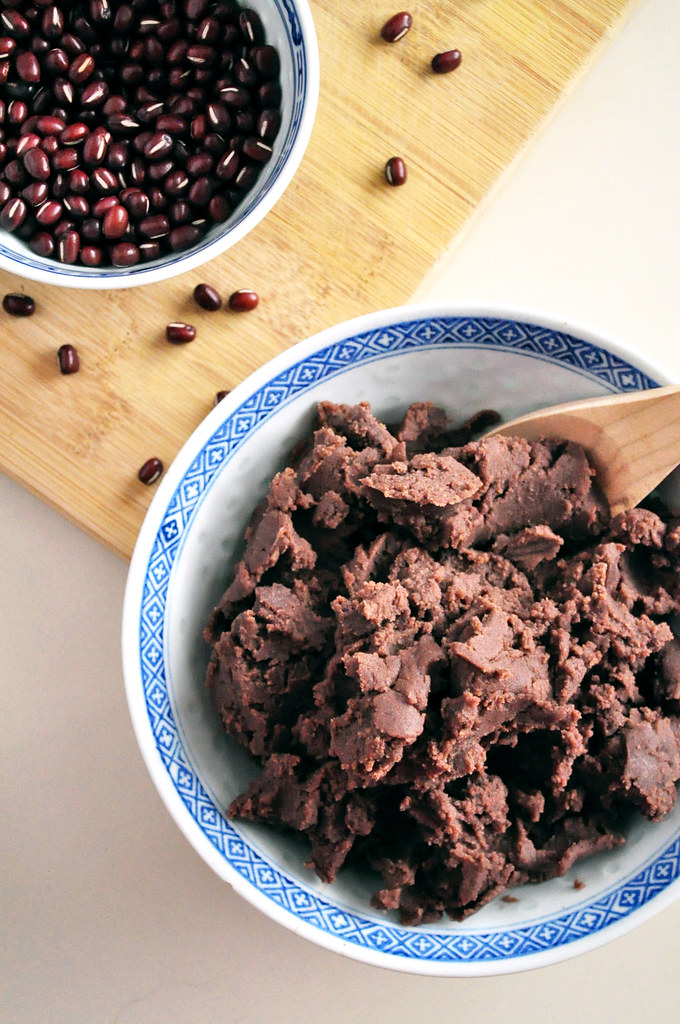
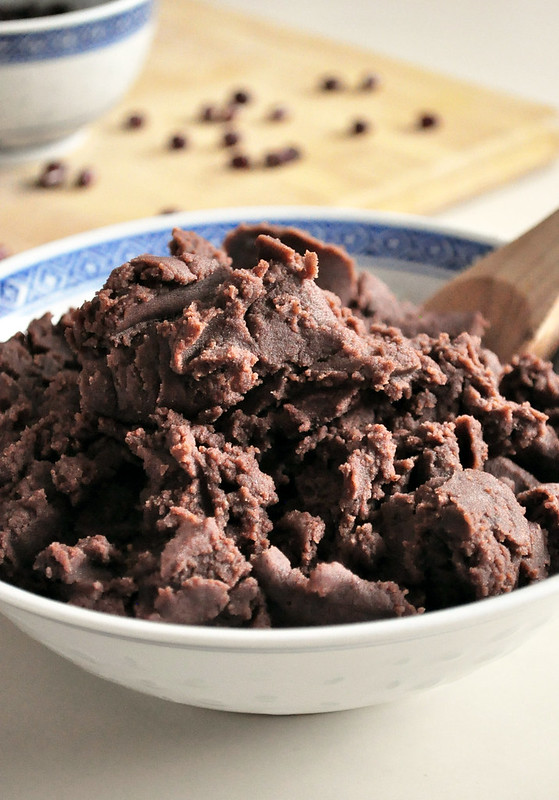
red bean paste earlier this week, I've been working on incorporating it into some desserts, which actually turned out harder than I thought. Red beans have a pretty delicate flavor that's really easy to overpower. I realized that when you eat it in traditional Asian desserts and snacks, it's usually as a ball of filling in something like a steamed bun or dumpling, so the bean paste's sweetness comes through.

Red Bean Cheesecake

Red Bean Cheesecake

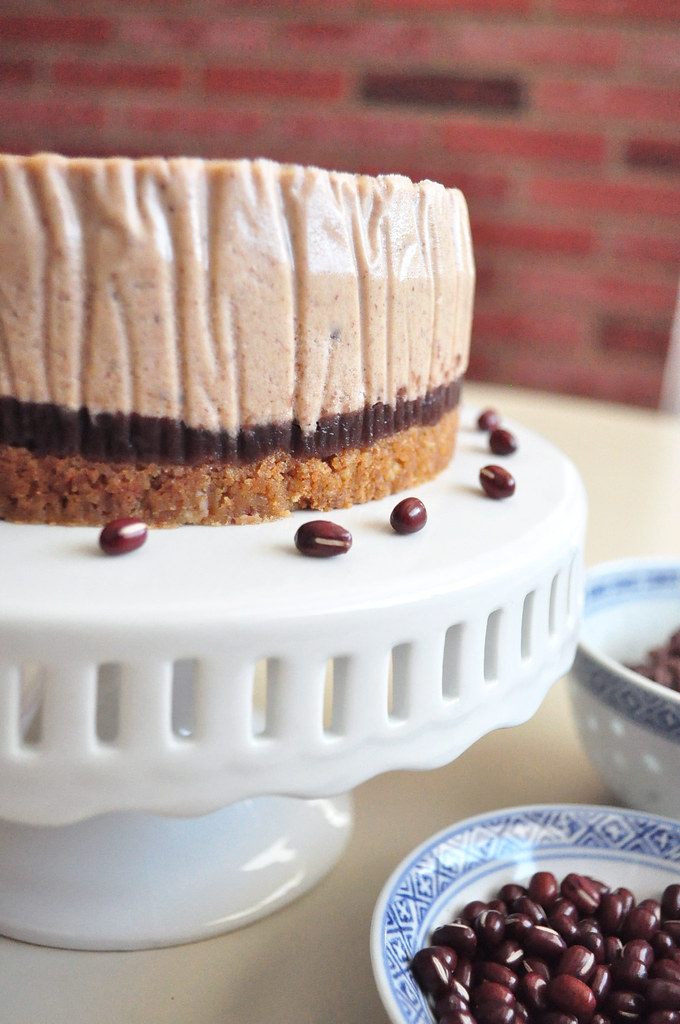
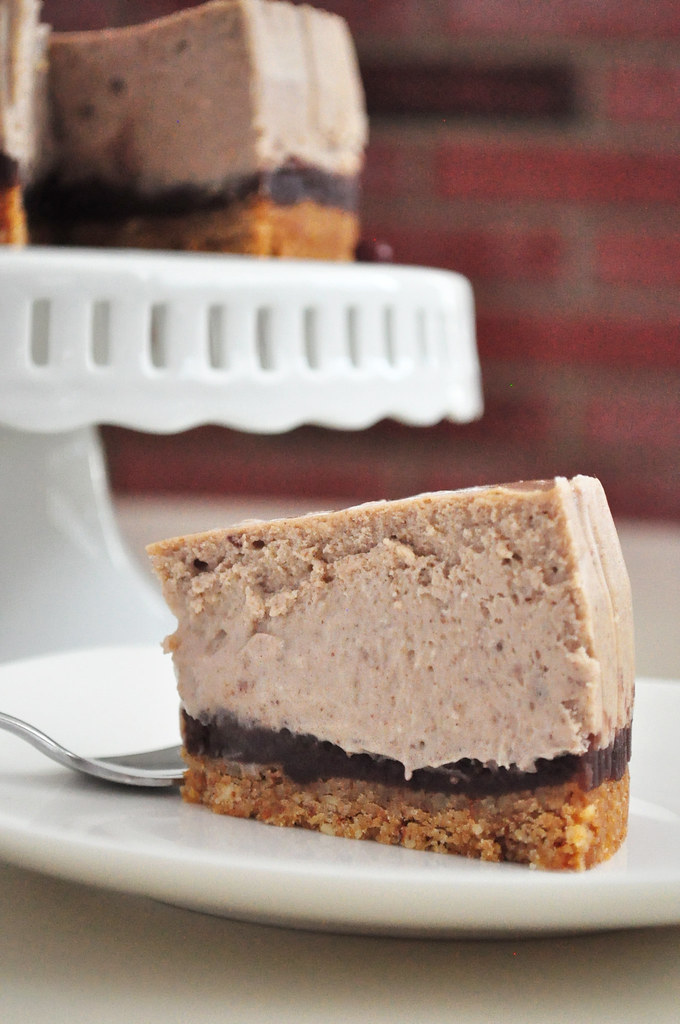
I was determined to make a cheesecake with the red bean paste, because I just really love cheesecake and wanted something different for dessert than the usual red bean soup for the new year. That and I don't like red bean soup =p So when making this cheesecake, I decided to add a layer of the bean paste in addition to mixing it into the batter to help make the bean flavor stronger. While I used homemade red bean paste, canned paste will work fine too. Making your own is really easy though and you can find my recipe for it here. The tangy cream cheese along with an almond crust go well with the red beans.

Red Bean Cheesecake

Red Bean Cheesecake


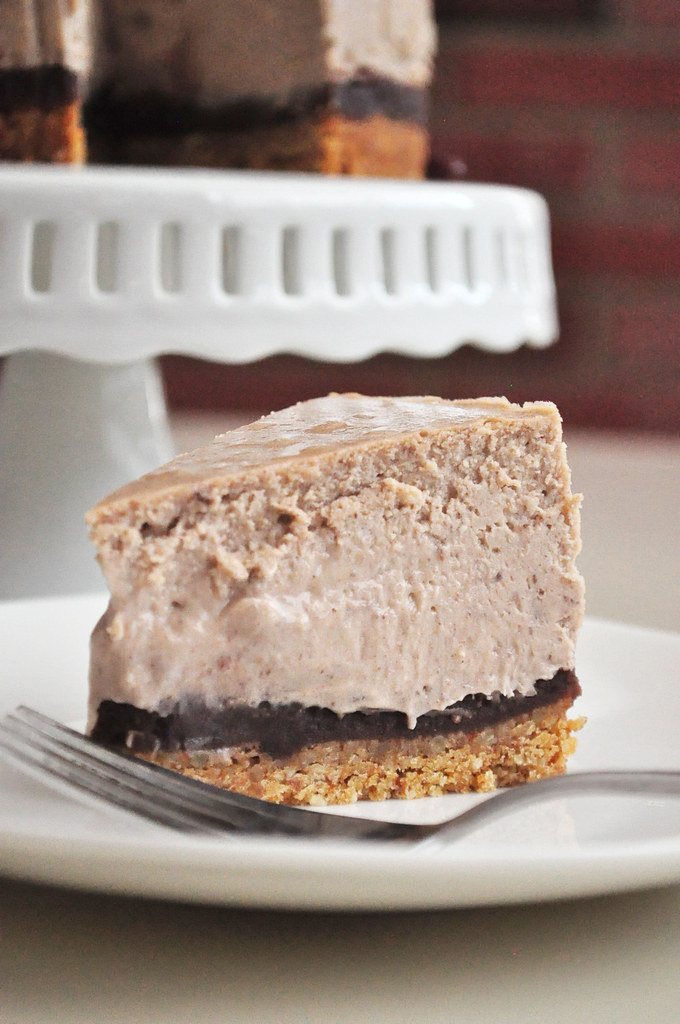
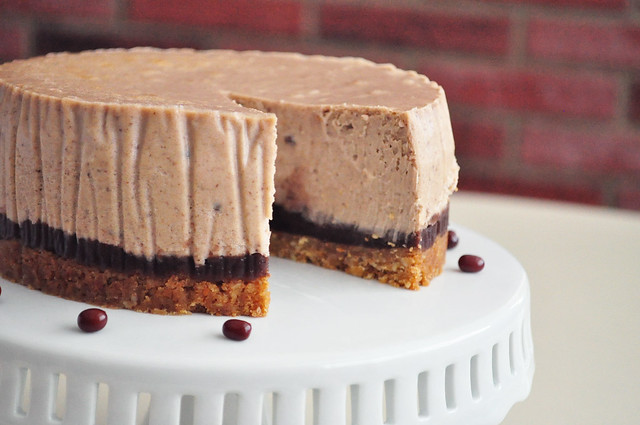
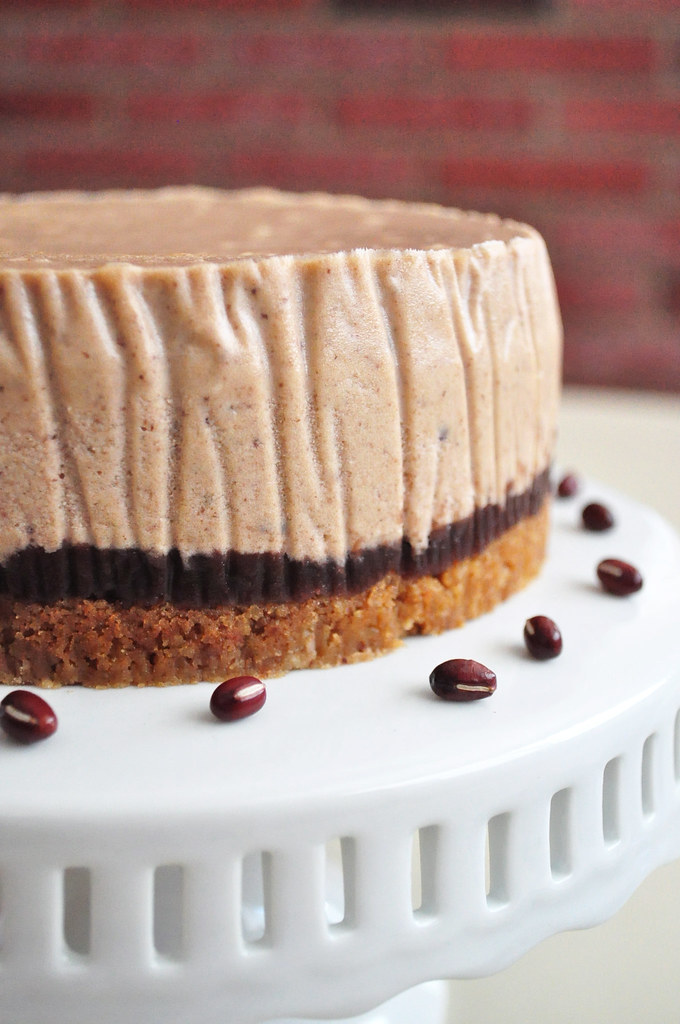
I have a confession, the lines along the sides of the cheesecake are from the parchment I used to line the pan because I did it kind of sloppily. I'm just going to pretend they're intentional =) Also, I kind of spaced out when I started baking the cheesecake, completely forgot when I put it in the oven and ended up taking it out a bit too early. So the middle is not as firm as I would like, as you can see from the photos, but it still tasted great!

This recipe makes a 6 inch cheesecake, but it's pretty rich so all you need is a small slice, which is great after eating a multi-course meal, but you still want something sweet. I hope everyone has some amazing dishes over the next few days and that this cheesecake is one of them! Enjoy!

Red Bean Cheesecake

Red Bean Cheesecake
Makes one 6 inch cheesecake

Ingredients

Crust
1/2 cup (48g) graham cracker crumbs, about 3-1/4 cracker sheets
1/4 cup (40g) almonds
1 tbsp (13g) light brown sugar, packed
1/8 tsp salt
3 tbsp (42g) unsalted butter, melted 

Filling
10 oz (284g) cream cheese, softened
1/3 cup (69g) white sugar
1/4 tsp salt
1/2 tsp vanilla extract
1-1/2 cups (364g) red bean paste, divided. Recipe to make your own here
1/3 cup (89g) heavy cream, room temperature
2 eggs, room temperature

Directions
Preheat oven to 350°F. Butter a 6 inch springform pan, line with parchment and then butter the parchment. In a food processor pulse the almonds until finely ground. Add the graham cracker crumbs, brown sugar, salt and pulse to mix together. Add the melted butter and pulse until combined and moist crumbs form. Press the crumbs into the bottom of prepared pan and bake for about 8-10 minutes until set and edges are golden. Remove from oven and allow to cool. Spread half of the red bean paste in an even layer over the crust. Wrap the bottom of the pan with tinfoil, making sure the foil comes up at least 3/4 of the pan's sides.

Preheat oven to 325°F. Place a kettle of water on to boil. In the bowl of a stand mixer with the paddle attachment, beat the sugar, cream cheese, and salt on medium low speed until smooth and creamy. Mix the remaining red bean paste with the heavy cream and vanilla until smooth, then add to the cream cheese mixture and mix until combined. Scrape the bowl down and with the mixer on low, add the eggs, mixing well. Pour into cooled crust and place the cheesecake pan into another, larger baking dish. Pour enough boiling water into the larger baking dish until it comes about halfway up the sides of the cheesecake pan. Bake for about 1 hour and 10 minutes until the edges have set but the center of the cheesecake has a slight jiggle. Remove from water bath and allow to cool to room temperature then chill in the fridge for at least 4 hours. Unmold from pan, slice and enjoy!

Feb 16, 2015

Homemade Sweet Red Bean Paste

Continuing with dessert planning for Chinese New Year, I knew I had make some homemade sweet red bean paste. Often used in many Asian desserts and snacks, red bean paste can be found in steamed buns, sesame balls, ice cream, dumplings, and many other pastries.

I've used canned red bean paste before, but always found it way too sweet for my taste. Making your own is actually pretty easy, it just takes a bit of time but you can adjust the sugar and sweetness to your liking.

Homemade red bean paste

Homemade red bean paste

To start, the beans should be rinsed and soaked in water overnight to help reduce the cooking time. After soaking, the beans are drained and placed into a pot with enough water to cover them by a few inches and simmered until soft. The beans and cooking liquid are then pressed through a fine mesh strainer to remove the skins. You could also use a blender or food processor to blend the beans into a smooth paste without removing the skins first, but I prefer using the strainer for a smoother texture.

Homemade red bean paste

Sugar, salt, and vegetable oil are added to the paste, which is then cooked down to get rid of any excess liquid and thicken the paste up. Allow to cool and that's it, you now have red bean paste to use in any recipe you choose!

Growing up, I would often have steamed buns filled with this sweet bean paste on the weekend, so I'm definitely going to try making some. Along with ice cream, I've been experimenting with red bean cheesecake and cookies and I'll be getting a recipe up for them soon! Enjoy!

Homemade red bean paste

Homemade Red Bean Paste
Makes about 2-1/4 cups ( 537g) of paste

Ingredients
8 oz (229g) dried adzuki beans
Water as needed for boiling
1/2 cup (104g) white sugar
1/4 tsp salt
1/4 cup (38g) vegetable oil

Directions

Rinse the beans and place in a large bowl. Cover with water and soak overnight. Drain and place the beans in a pot with 3 cups of water and bring to a boil. Reduce the heat to medium low and simmer the red beans for 1-2 hours until soft, stirring occasionally. If there is still a lot of water in the pot, continue cooking until there is only a thin layer of water covering the beans

Press the beans and any excess liquid through a fine mesh strainer set over a pot. Discard the leftover skins. Add the sugar, salt, and vegetable oil to the red bean paste and cook over medium low heat, stirring often until the paste thickens. Allow to cool.

Feb 13, 2015

Writing a Craft Book

With Happy-Gurumi coming out in a few weeks (on March 10th!) I've been looking back on everything that went into making the book. I can't believe that it's been two years since I sent out that first proposal and started filling a bright pink binder with notes, revisions, and pattern testing. I've learned so much about what goes into publishing a craft book, both expected and unexpected, so I've decided to share some details of the work process behind Happy-Gurumi!

writing a book

Feb 3, 2015

Chewy Almond Cookies

It seems the holidays were not too long ago and I was baking up a storm. Cookies, cheesecake, chocolate mousse, I even made an ice cream cake. I didn't think it was possible, but I was kind of over desserts and baking by the time January rolled around. Well now it's been over a month since I've made anything and I'm ready to get my cookie back on!

With Chinese New Year coming up, I've been thinking about what to bring to my family celebrations later this month and these almond cookies are definitely on the list!

chewy almond cookies

Jan 11, 2015

Hellloooooo 2015!

Happy first week of 2015! Or really happy second week, because I'm late in posting this. Geez, time flies! Anyway, I hope everyone had a fun and relaxing time during the holidays. Per usual, I got a cold, ate way too much, got a cold again, and caught up with friends and family. Aside from getting sick, I had a really great time!

While 2014 was a pretty good, I'm really looking forward to this year. I have a couple of big things coming up that will hopefully lead to even bigger opportunities for The Pudgy Rabbit!

First up is my crochet book, Happy-Gurumi! I can't believe that it's coming out in just a couple of months, on March 10th. It seems nuts that just a year ago, I was crocheting like crazy, turning my sketches into working patterns and somehow a book came out of the mess of yarn that covered my desk. Big thank you to my editors at Martingale for all their hard work and pulling everything together. You can pre-order the book right now at Amazon and Barnes and Noble!

And if you don't know how to crochet, not to worry, there are detailed instructions with plenty of pictures that will teach you the all basics. A new year, a new craft, that's what I always say! ;)

Happy-gurumi: 20 Super Cute Amigurumi Toys to Crochet

Then in May, I'm going to be exhibiting at the National Stationery Show! This is my first trade show and I'm really excited to be doing such a big fair. There's going to be thousands of attendees along with some really major retailers and lots of press. I'm actually a bit nervous because I've only exhibited at much smaller craft fairs so far and I haven't even done that many fairs in general. It's kind of a big leap to do such a major show and I have so many things that I need to prepare that it makes me panic a little. But I figure it's good to take some risks and this would be great exposure for the shop, so out of my comfort zone I go!

On the plus side, my crochet kits have already been highlighted by the NSS and they're currently a part of their favorite things for the 2015 show! Whoo hoo!

National Stationery Show

The Pudgy Rabbit

In other news, I'm also working on some new things for the shop, developing patterns, and planning out some new products. The next few months are going to be really busy, but I'm coming out of my cookie and fatty food induced holiday haze and super excited to get started!

So I wish everyone a happy and healthy new year and hope that the next twelve months are great! Cheers to 2015!